Users with college administrator access have the ability to adjust workflow steps for individual proposals as needed. This includes adding, deleting, and rearranging workflow steps.
To make a workflow change, college administrators can navigate directly to the Workflow tab on the CourseLeaf Dashboard to locate the appropriate proposal. Alternatively, college administrators can click on the Page Approval link that is included in the automated email sent when it is their step in the workflow process.

Once on the dashboard, follow the Understanding the CourseLeaf Dashboard instructions to open the appropriate proposal in the Approval Screen.
When the proposal is open in the Approval Screen, click the Pending Workflow icon button (list icon button) on the left side of the header bar.

This will open a pop-up window that displays a list of all workflow steps the form has completed (Completed) as well as a list of all workflow steps that still must be completed (Pending).

To update the workflow for this specific proposal during this approval cycle only, click the Update button at the bottom of the pop-up window.

The Update Pending Workflow tool will open in a new browser window for you to update the pending workflow steps as desired (as described below).
Note 1: An automated email will not be sent if the first user in the Pending Workflow is changed. In addition, the first user in the Pending Workflow list should not be updated to an FYI workflow step.
Note 2: Never remove the Admin Only FYI step. This step triggers the opening of the administrative fields at the bottom of the proposal. If that step is removed from the workflow, those fields will never open on the form.

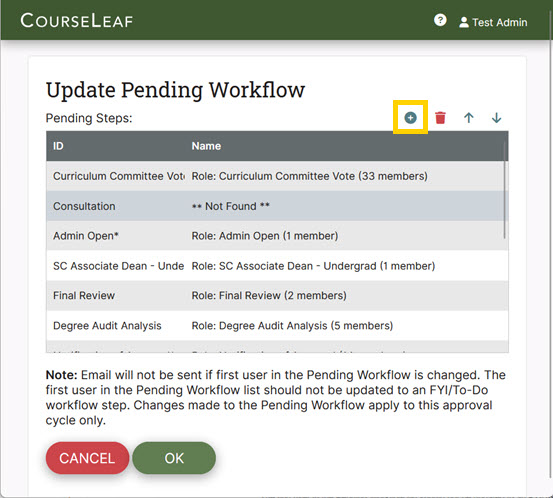
To add a step to the workflow, click the Green Plus Sign Button in the upper right side of the Update Pending Workflow tool.

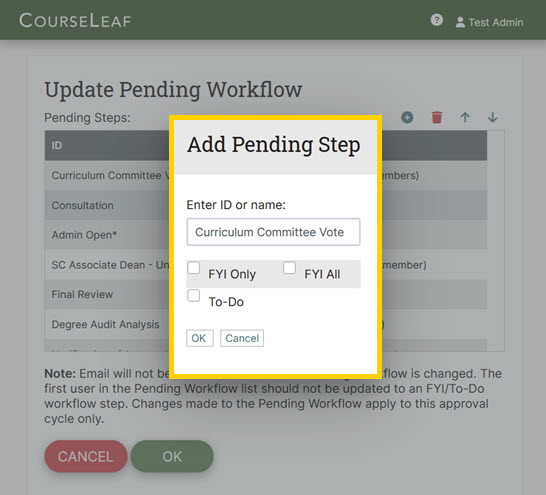
In the Add Pending Step pop-up window, enter the appropriate workflow step identification in the Enter ID or name field. This identification must exactly match the role in Role Management.
Some common workflow steps include:
Once you have entered the correct workflow step identification, click the OK Button.

The added step now appears in your list of pending steps.

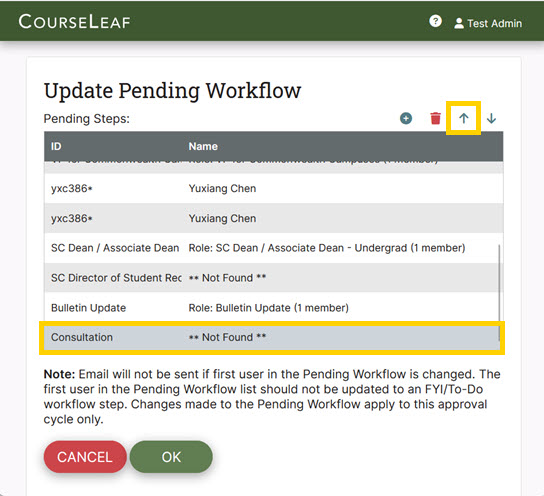
To move the newly added step to the appropriate position in the pending workflow, select the step with your cursor and click the Green Arrow Up and Arrow Down Buttons until the step is in place.

Click the OK Button to save your changes.

Your added step now appears in the Pending Workflow pop-up window.

To rearrange steps in the workflow, select the step you wish to move and click the Green Arrow Up and Arrow Down Buttons until the step is in place.

Click the OK Button to save your changes.
Your step is now in its new position in the Pending Workflow pop-up window.
To delete a step in the workflow, select the step you wish to delete and click the Red Trash Can Button.

An alert will pop-up asking you to confirm the step deletion. Click the OK Button to confirm.

The deleted step no longer appears in the Update Pending Workflow tool.

Click the OK Button to save your changes.

The deleted step has been removed from the Pending Workflow pop-up window.

Scenario: The proposal currently is being reviewed by the Curriculum Committee. The committee requests additional consultation and wants to see the proposal again afterwards.
Solution: To accomplish this request, you must first edit the proposal and then modify the proposal's pending workflow steps. Instructions for both parts are as follows:
Go to the Workflow tab on the CourseLeaf Dashboard to locate the appropriate proposal. Once there, select the Curriculum Committee Vote step from the Role dropdown field.

Scroll through the results table to locate the appropriate proposal form. If the list is long, you can use the Type and Term filter dropdown fields to narrow the results.
Click on form in the results table to open the Approval Screen for that item.

The Approval Screen appears in a pop-up window in front of the dashboard.

From the header bar, click the white Edit Button to open the proposal. The proposal will open in a new window.

On the proposal, scroll down to the Consultation section.

If the individual needed for consultation is already listed as a consultant, change the Include in Consultation dropdown selection from Consultation Sent to Include to ensure the proposal is sent back that person.

If the individual needed for consultation is not already listed as a consultant, click the Green Plus Sign Button to add the person.

This will add a row to the bottom of the consultants list. In the new row, enter the name or user ID of the individual to be consulted.
For best results when entering a name, type the individual's last name in the form field. As you begin to type, a list of suggestions from the Penn State directory will pop up, from which you can select.

The selected individual's name will be added. For this person, select Include in the Include in Consultation field. Then, enter the consultant's department, college, campus, and/or area of expertis in the Consultant Unit field.
The Consultant's Response field will appear disabled at this point since the response will be selected by the consultant upon review of the proposal.

Once you have finished making the appropriate changes to the Consultation section, click the Save Changes Button at the bottom of your screen to save the information to the program proposal.

The proposal window will close, returning you back to the Approval Screen.
From the Approval Screen, click the Pending Workflow icon button (list icon button) on the left side of the header bar.

In the Pending Workflow pop-up window, click the Update button to update the workflow with the needed consultation step for this proposal for this approval cycle only.

The Update Pending Workflow tool will open in a new browser window for you to update the pending workflow steps.

To add a Consultation step to the workflow, click the Green Plus Sign Button in the upper right side of the Update Pending Workflow tool.

In the Add Pending Step pop-up window, enter "Consultation" and click the OK Button.

With the new Consultation step selected, click the Green Arrow Up Button to move the step up to the spot directly after the Curriculum Committee Vote step.
To allow the Curriculum Committee to review the proposal again after the Consultation step, one additional step will need to be added to the pending workflow. Click the Green Plus Sign Button in the upper right side of the Update Pending Workflow tool.
In the Add Pending Step pop-up window, enter "Curriculum Committee Vote" (the step the proposal is current at) and click the OK Button.
Because of the cursor placement, this new step should appear directly after the Consultation step just added, but if necessary use the Green Arrow Up and Arrow Down Buttons to move this step directly below the Consultation step.
Once the step is in place, click the OK Button to save your changes.

Your added Consultation and Curriculum Committee Vote steps now appear in the Pending box on the Workflow Status tab.

From the Approval Screen header bar, click the green Approve Button to send the proposal to the newly added Consultation step.

The proposal will be sent to the Consultation step. Once that step is complete, the proposal will return to the Curriculum Committee Vote step for the committee to review again.